FlappyBoy: Making a simple Game Boy game
Building a small Game Boy game in assembly
Introduction
After watching this great talk called “The Ultimate Game Boy Talk” given by Michael Steil I felt inspired to investigate and play a bit more with the Game Boy I had laying around.
I’ve previously implemented the same game using GBDK, which is a great tool, but I did feel like I was cheating since I was programming in C and I wasn’t really exploring the console’s features and limitations, specially becuause GBDK provides a rich and easy to use library. It felt like killing a fly with a missile shot by a drone.
I’m not going to go into fine details of the Game Boy internals. The talk I mentioned before explains everything very well.
Weapons of Choice
Since I wanted to move away from GBDK that meant that my only option was to find an assembler and linker that would allow me to generate a ROM that could run on device. There is a nice list of tools that can be found here. I chose RGBDS which is a well documented toolchain for assembling my program. I also needed a way of getting the ROM to play on my Game Boy and a tool for testing and debugging. For the first thing I went with the EverDrive GB, it’s not a cheap solution but it’s worth the money. You can easily load your ROMs using a micro SD card. For the emulator I decided to go with BGB. Without a doubt this has to be one of the best emulators with a debugger out there. Just look at it.
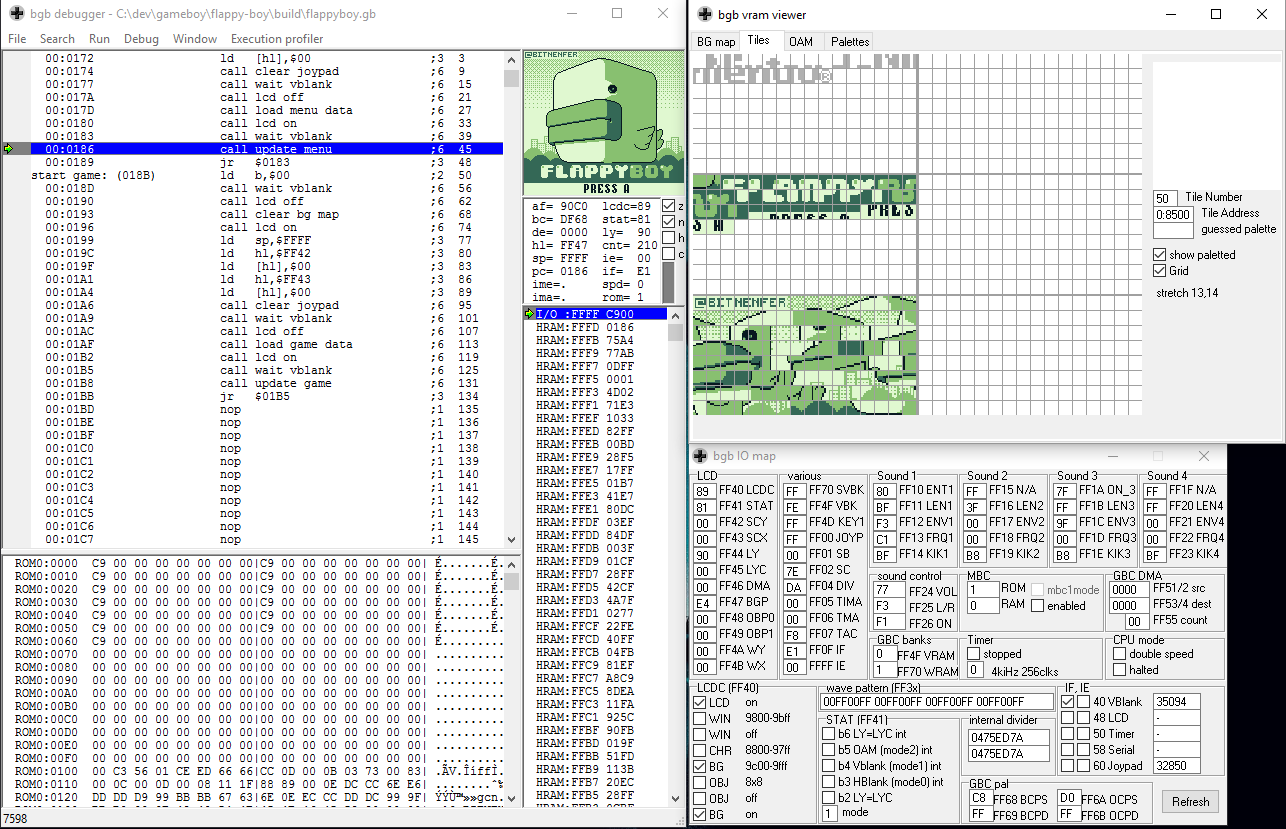
It allows you to set code and data breakpoints, explore memory, load debug symbols, visualize VRAM and the registers and so much more.
For transforming my PNG assets to valid byte data I used this nice online tool called Game Boy Tile Data Generator. It’s very straight forward.
Building…
After a while it gets a bit tedious to the execute the assembler and linker by hand. So I made this helpful and kind of generic Makefile for building my project.
# Simple makefile for assembling and linking a GB program.
rwildcard       =   $(foreach d,$(wildcard $1*),$(call rwildcard,$d/,$2) $(filter $(subst *,%,$2),$d))
ASM             :=  rgbasm
LINKER          :=  rgblink
FIX             :=  rgbfix
BUILD_DIR       :=  build
# Name of the game
PROJECT_NAME    ?=  flappyboy
OUTPUT          :=  $(BUILD_DIR)/$(PROJECT_NAME)
SRC_DIR         :=  src
INC_DIR         :=  include/
SRC_Z80         :=  $(call rwildcard, $(SRC_DIR)/, *.z80)
OBJ_FILES       :=  $(addprefix $(BUILD_DIR)/obj/, $(SRC_Z80:src/%.z80=%.o))
OBJ_DIRS        :=  $(addprefix $(BUILD_DIR)/obj/, $(dir $(SRC_Z80:src/%.z80=%.o)))
ASM_FLAGS       :=  -i $(INC_DIR)

.PHONY: all clean

all: fix

fix: build
    $(FIX) -p0 -v $(OUTPUT).gb

build: $(OBJ_FILES)
    $(LINKER) -m $(OUTPUT).map -n $(OUTPUT).sym -o $(OUTPUT).gb $(OBJ_FILES)

$(BUILD_DIR)/obj/%.o : src/%.z80 | $(OBJ_DIRS)
    $(ASM) $(ASM_FLAGS) -o $@ $<

$(OBJ_DIRS):
    mkdir -p $@

clean:
    rm -rf $(BUILD_DIR)

print-%  : ; @echo $* = $($*)
My project was composed by two directories, ’./include/’ and ’./src/’. Very C of my part. Anything that is on the ’./src/’ directory is assembled and linked into a GB file.
Programming the Game Boy
First I needed to read and understand the instruction set that the Game Boy CPU uses. It’s very similar to the Z80, but not really. I used this great manual (http://marc.rawer.de/Gameboy/Docs/GBCPUman.pdf) that compiles a great amount of information about the device, going from the register set, memory map, serial I/O, interrupts, etc. This was the document I had open all the time while programming.
I started coding the game with the idea I didn’t wanted to build a “library” or an “engine”. The game is very simple and didn’t wanted to over-engineer by adding unnecessary extra code. I did how ever add simple helper subroutines that made my life easier, for example for loading big chunks of data into VRAM, clearing the MAP memory area or resetting the gameboy registers.
Here is the subroutine I used to copy assets (tile and map data) into VRAM. It’s basically a memcpy written for the game boy’s CPU.
memcpy::
    ; DE = block size
    ; BC = source address
    ; HL = destination address
    dec DE

.memcpy_loop:
    ld A, [BC]
    ld [HL], A
    inc BC
    inc HL
    dec DE

.memcpy_check_limit:
    ld A, E
    cp $00
    jr nz, .memcpy_loop
    ld A, D
    cp $00
    jr nz, .memcpy_loop
    ret
Of course this isn’t the fastest memcpy ever but it does the work.
Another subroutine I used a lot was for checking the button input.
read_joypad::
    ; Read P14
    ld HL, USER_IO
    ld A, $20
    ld [HL], A
    ld A, [HL]
    ld HL, IO_P14
    ld B, [HL]
    ld [HL], A
    ld HL, IO_P14_OLD
    ld [HL], B

    ; Read P15
    ld HL, USER_IO
    ld A, $10
    ld [HL], A
    ld A, [HL]
    ld HL, IO_P15
    ld B, [HL]
    ld [HL], A
    ld HL, IO_P15_OLD
    ld [HL], B

    ; Reset
    ld HL, USER_IO
    ld A, $FF
    ld [HL], A
    ret
What I do here is read the register that are used to map the current button input and store the values on memory. First I save the previous value into IO_PXX_OLD and then store the fresh input value into IO_PXX. This allows me to not only check when a button is pressed down but also when it’s hit. The last one is useful when you want to do an action only when the button was initially pressed.
For example here is how I handle the “jumping” action of the player character.
; Check if Button A
; was hit
ld HL, IO_P15
bit BUTTON_A, [HL]
jr nz, .player_update_no_input
ld HL, IO_P15_OLD
bit BUTTON_A, [HL]
jr z, .player_update_no_input
I first check if the button A was pressed on IO_P15, and then check if this value is different from IO_P15_OLD, which contains the last input update. If they are both different I continue with the jumping simulation.
Screen Effects
This is probably on what I spent most of the time working and what I am most proud of. The menu wave effect, parallax scrolling, fading the screen and even the blinking “Press A” on the menu.
Here you can see all of them in a single animation:

Starting with the easiest. Fading is simply done by modifying the background color palette. There is a register that can be found at address $FF47. This register is known as BGP or background palette. The palette is described in 4 sets of 2 bit values. The darkest shade is 11 and the lightest is 00. 11100100 would be considered a “default palette”.
What I do is simply modify this value in this order for fade in:
11111111
11111110
11111001
11100100
For fade out is the same sequence but reversed.
The wave, parallax and blinking text use the same technique in different ways.
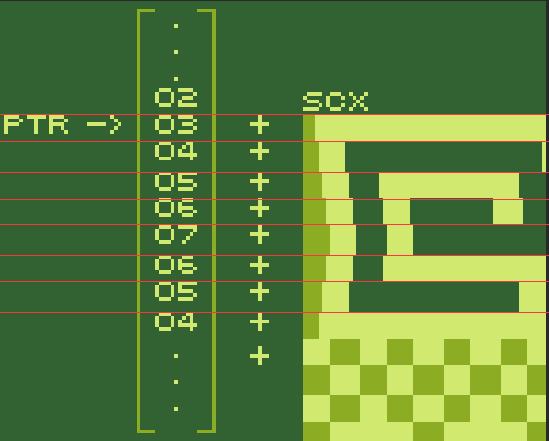
I made the wave effect by modifying the register SCX (Scroll X) with a different offset on HBLANK. This happens for every “scanline” of the LCD. The wave offsets was pregenerated and I just stored it in memory as a lookup table. To make it move I simply increment a pointer that references the wave lookup table.
This is a visualization of what happens:
For the parallax scrolling on the game I use a similar technique. What I do different, is that I wait for the LCY (LCD vertical line) register to hit specific values to increment the SCX register.
Something like this:
; Scroll buildings
ld HL, [LCD_LY]
ld A, [HL]
cp $65              ; loop until we reach the vertical line n. 101 ($65)
jr nz, .repeat
ld HL, [LCD_SCX]    ; if we reached it, we offset SCX by the building parallax value
ld A, [HL]
adc A, BUILDING_PARALLAX_VALUE
For the blinking effect I do the same thing as the parallax but instead of modifying the SCX register I flip the BGP register between %11100100 and %00000000.
The Game
Here you can play the game online
Here you can look at the source code
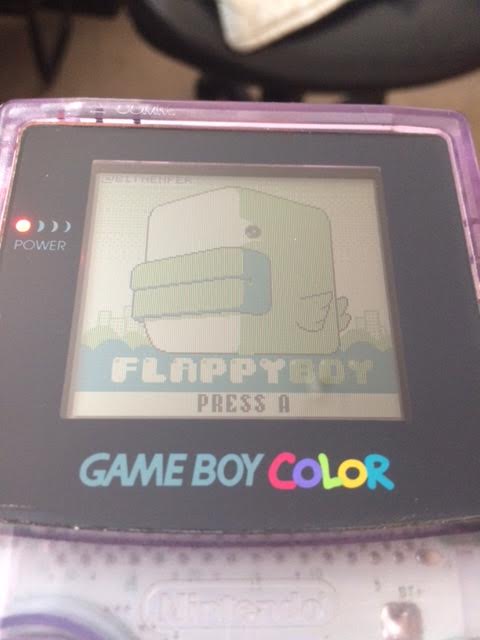
This is a small video of the game running on a Game Boy Color.
I am done with this game. It was a nice learning experience pic.twitter.com/ZVtbEPckoJ
— Felipe Alfonso (@bitnenfer) January 21, 2017
Conclusion
This was a great learning experience. I’ll definitely look into making more demos for the Game Boy. One thing I regret not exploring was the sound. I mostly focused my efforts into learning about how the Game Boy displayed pixels on screen. I’ll surely keep in my TODO list looking how to play sound and music in the console.